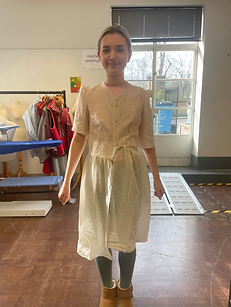
Marina Costume
Housewife 49
For this project I collaborated with a fellow student and brought to life their design. The aim was to accurately interpret a design in to a real life garment.

The first step of the project was the designer meeting, during which we discussed what exactly the designer wanted and I made notes to ensure the dress came out exactly the way the designer envisioned it. This design was drawn by the designer for this project, Jasmine Pickford. I found this step very helpful as drawings can be interpreted in different ways and it helped me find the designers exact vision.
Before starting to make the dress, I drew a technical drawing with all the seams drawn on, I also noted all of the fastenings. This was very useful because I figured out while drawing this that the design we had discussed would not fit onto a person due to the opening not going below the waist. I corrected this by adding a mall placket just below the waist at the front, which allowed the performer to comfortably put the dress on. I will make sure to not skip this step in future projects because it helps to make sure that I don't make mistakes when it comes to fastenings and practicalities.


To ensure that the patterns I had drafted were correct, I made a toile to ensure that the proportions were correct. I found that the made problem with the toile was that the waist was too low and therefore, the skirt was too short. So, I made sure to go back to my patterns and measure out how much needed to be taken off the bodice and added on to the skirt and adjust them appropriately. I also extended the front of the bodice a bit so that it was a more comfortable fit. I also used the toile to figure out exactly how long the sleeves should be and it was far shorter than I expected. I found this step extremely helpful and will make sure to make at least one toile, if not more, for all my future projects as it is the best way of making sure that the garment will actually fit the performer.
One of the tasks for this project was to include pattern matching. As I was working with checkered fabric I had to pattern match a lot. I found this complicated at first but once I got the hang of it, I found it really satisfying and enjoyed it. It definitely made the dress look more put together and thought through and I look forward to incorporating this into another garment I make.


One of the most difficult parts of making the dress was the collar because I had never made a collar before and it was difficult to figure out how it worked. I had never realised that part of the type of collar is the bodice folded out. I found that bringing it in to 3D made it a lot easier for me to visualise, so I decided to map it out with pattern paper first and then adjust the collar shape on the pattern to fit the design. I found that this was a successful method in the end.

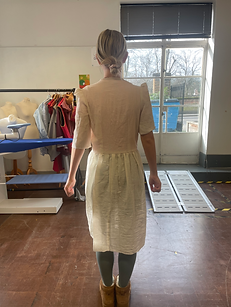
One of the main difficulties in this project was that the fabric frayed very easily. I wanted to finish the seams authentically so I started by using pinking shears and quickly realised that the fabric was still fraying due to the way it was woven. Therefore, all of the seams are hand finished with the hand blind hem stitch or bias bound. Although, this took a lot of time, I really like the result as it has made the inside of the dress very neat. I much prefer the look of these seams to an overlocked seam so I would like to finish some other garments in the same way in future projects.


To finish this project we had a final photoshoot day on location at a transport museum. I enjoyed doing this because it helped place the costumes in the time period they're supposed to be in and helped the costume come alive especially with the rest of the outfit put together as well. I would love to do final photoshoots like these for future projects because it helps do the work justice by presenting it in a professional manner.